DMC.micro Pro Recall Information
Due to an oversight on our part, some of the first batch of DMC.micro Pro units may have been built with an incorrect part on the main logic board. While these units completed our final test process without issues, we recommend they be serviced to ensure reliable operation.
How to identify a unit that requires service
Power on your DMC.micro Pro and watch the display. Make a note of your serial number and the firmware version of your unit.
Open your DMC.micro Pro by removing the screws holding the lower lid in place.
Locate U1 as shown in the images below. If it is labeled with a “17” then it is correct and does not require service. If U1 is labeled “25” then we recommend you send it back.
U1 shown circled in yellow
U1 detail - “25” component designator
How to obtain service
Fill out the form below to request service. If you are in the US, Disaster Area Designs will send you a replacement unit along with a prepaid shipping label to return your current controller. The replacement unit is yours to keep, no further action is required on your part once you return your original unit.
NOTE: For customers with custom colour units, we can’t provide an advance replacement and will have to repair your current unit. This should only require one business day plus shipping time.
How can I repair my unit myself?
We understand that not all users will wish to send their units back, whether due to the time required or the inconvenience.
If you’re handy with a soldering iron, you can repair the issue yourself without needing to send the unit in for repair. User repairs of this issue will NOT void the factory warranty. If you do decide to repair your unit, we’d appreciate you letting us know so we can cross your serial number off the list!
Equipment needed:
Soldering iron with fine tip
Hookup wire (24AWG or smaller)
Instructions:
Open your DMC.micro Pro by removing the four screws at the corners of the lid
Locate U1 on the main logic board
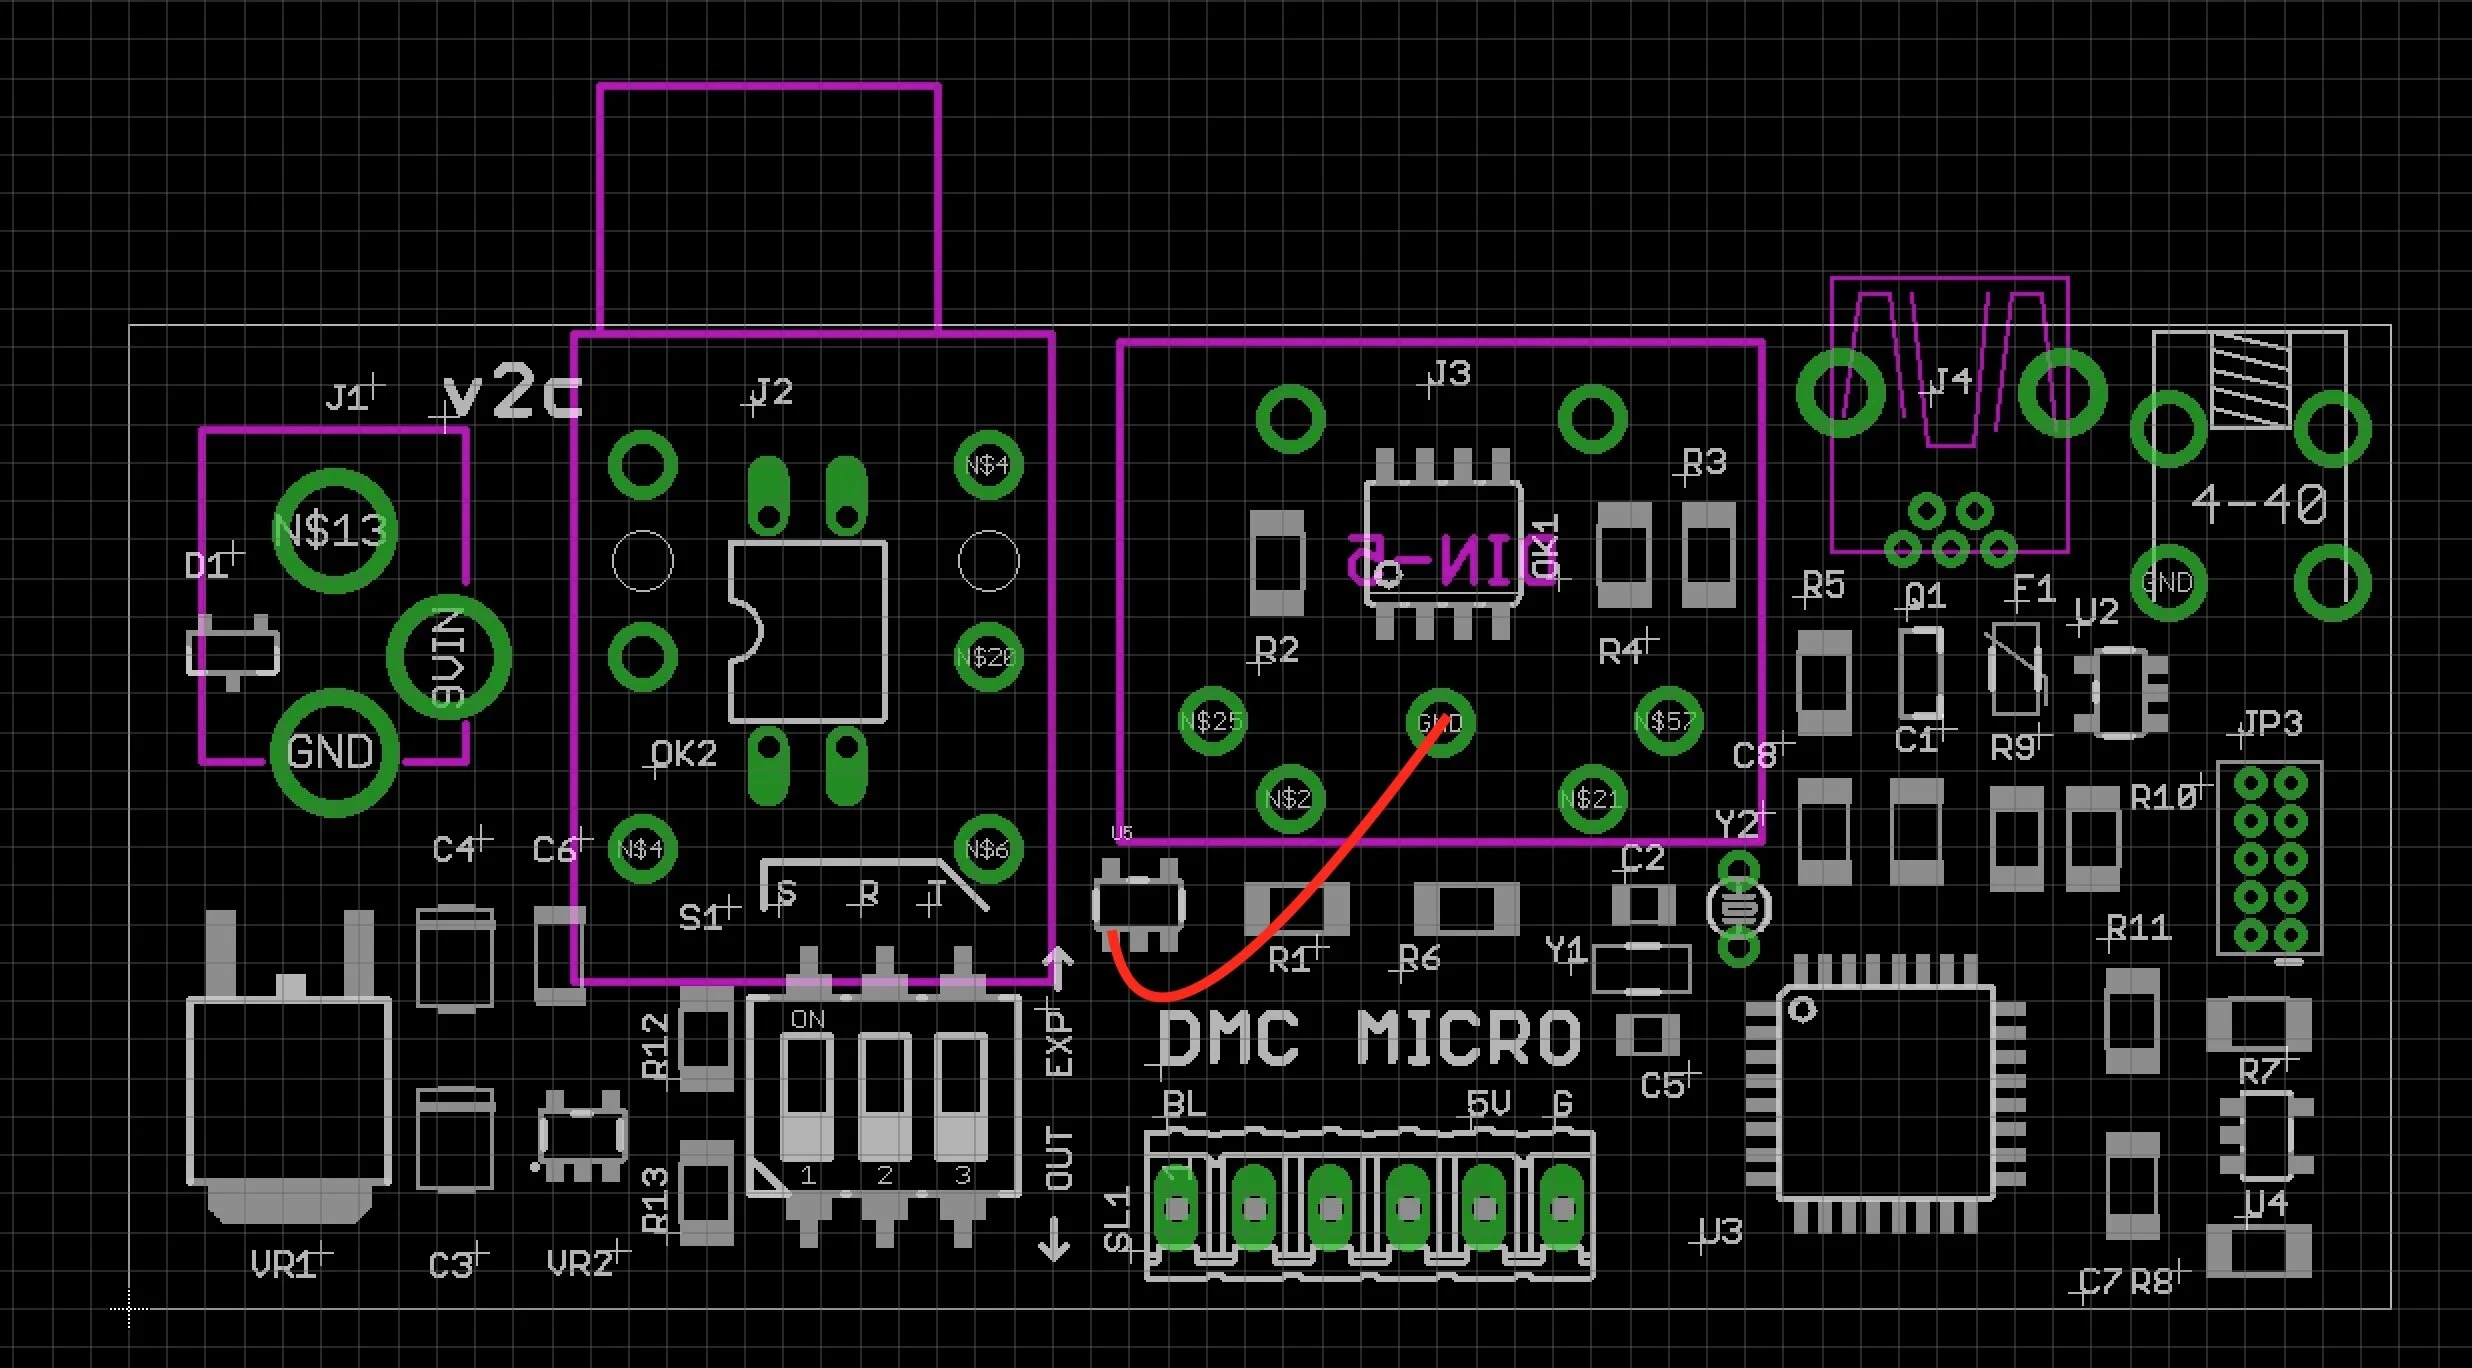
Solder a short piece of hookup wire to the center pin of the MIDI jack
Solder the other end of the wire to the lower-left pin of U1 as shown in the diagram below:
Ensure that nothing is short-circuited, and that no solder bridges exist on the pins of U1.
Replace the lid and lid screws, then power on your DMC.micro and test the MIDI port by connecting to a MIDI device and using the DMC buttons to snd commands.


